I used to have a spot in my deer woods that had two tree stands within 15 yards of each other. The newest stand was my father's idea because the deer in the evening showed up differently than the deer did in the morning. I didn't care; he was having fun and saw lots of deer. It's not very original, but we called the two stands "The Twin Towers."
One of the advantages of having those two blinds so close was that I could be in one of then with a camera, while a friend was in the other. I didn't do it often, because I'd rather be hunting myself, but once in a while I gave it a try. This was long before the invention of the GoPro cameras. If you wanted video, it took two people.
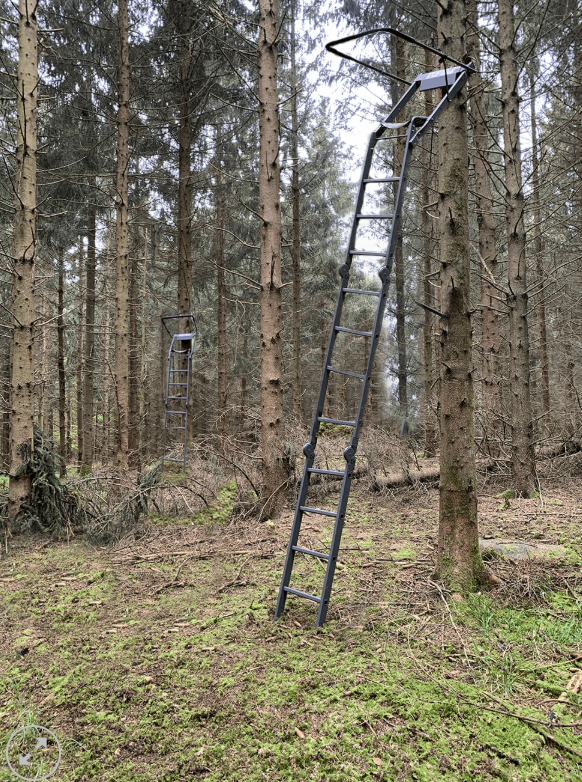
Both stands were occupied one evening, just days before the deer rifle season. Michigan's bow hunting season had been in full swing and the bucks were starting to get active.
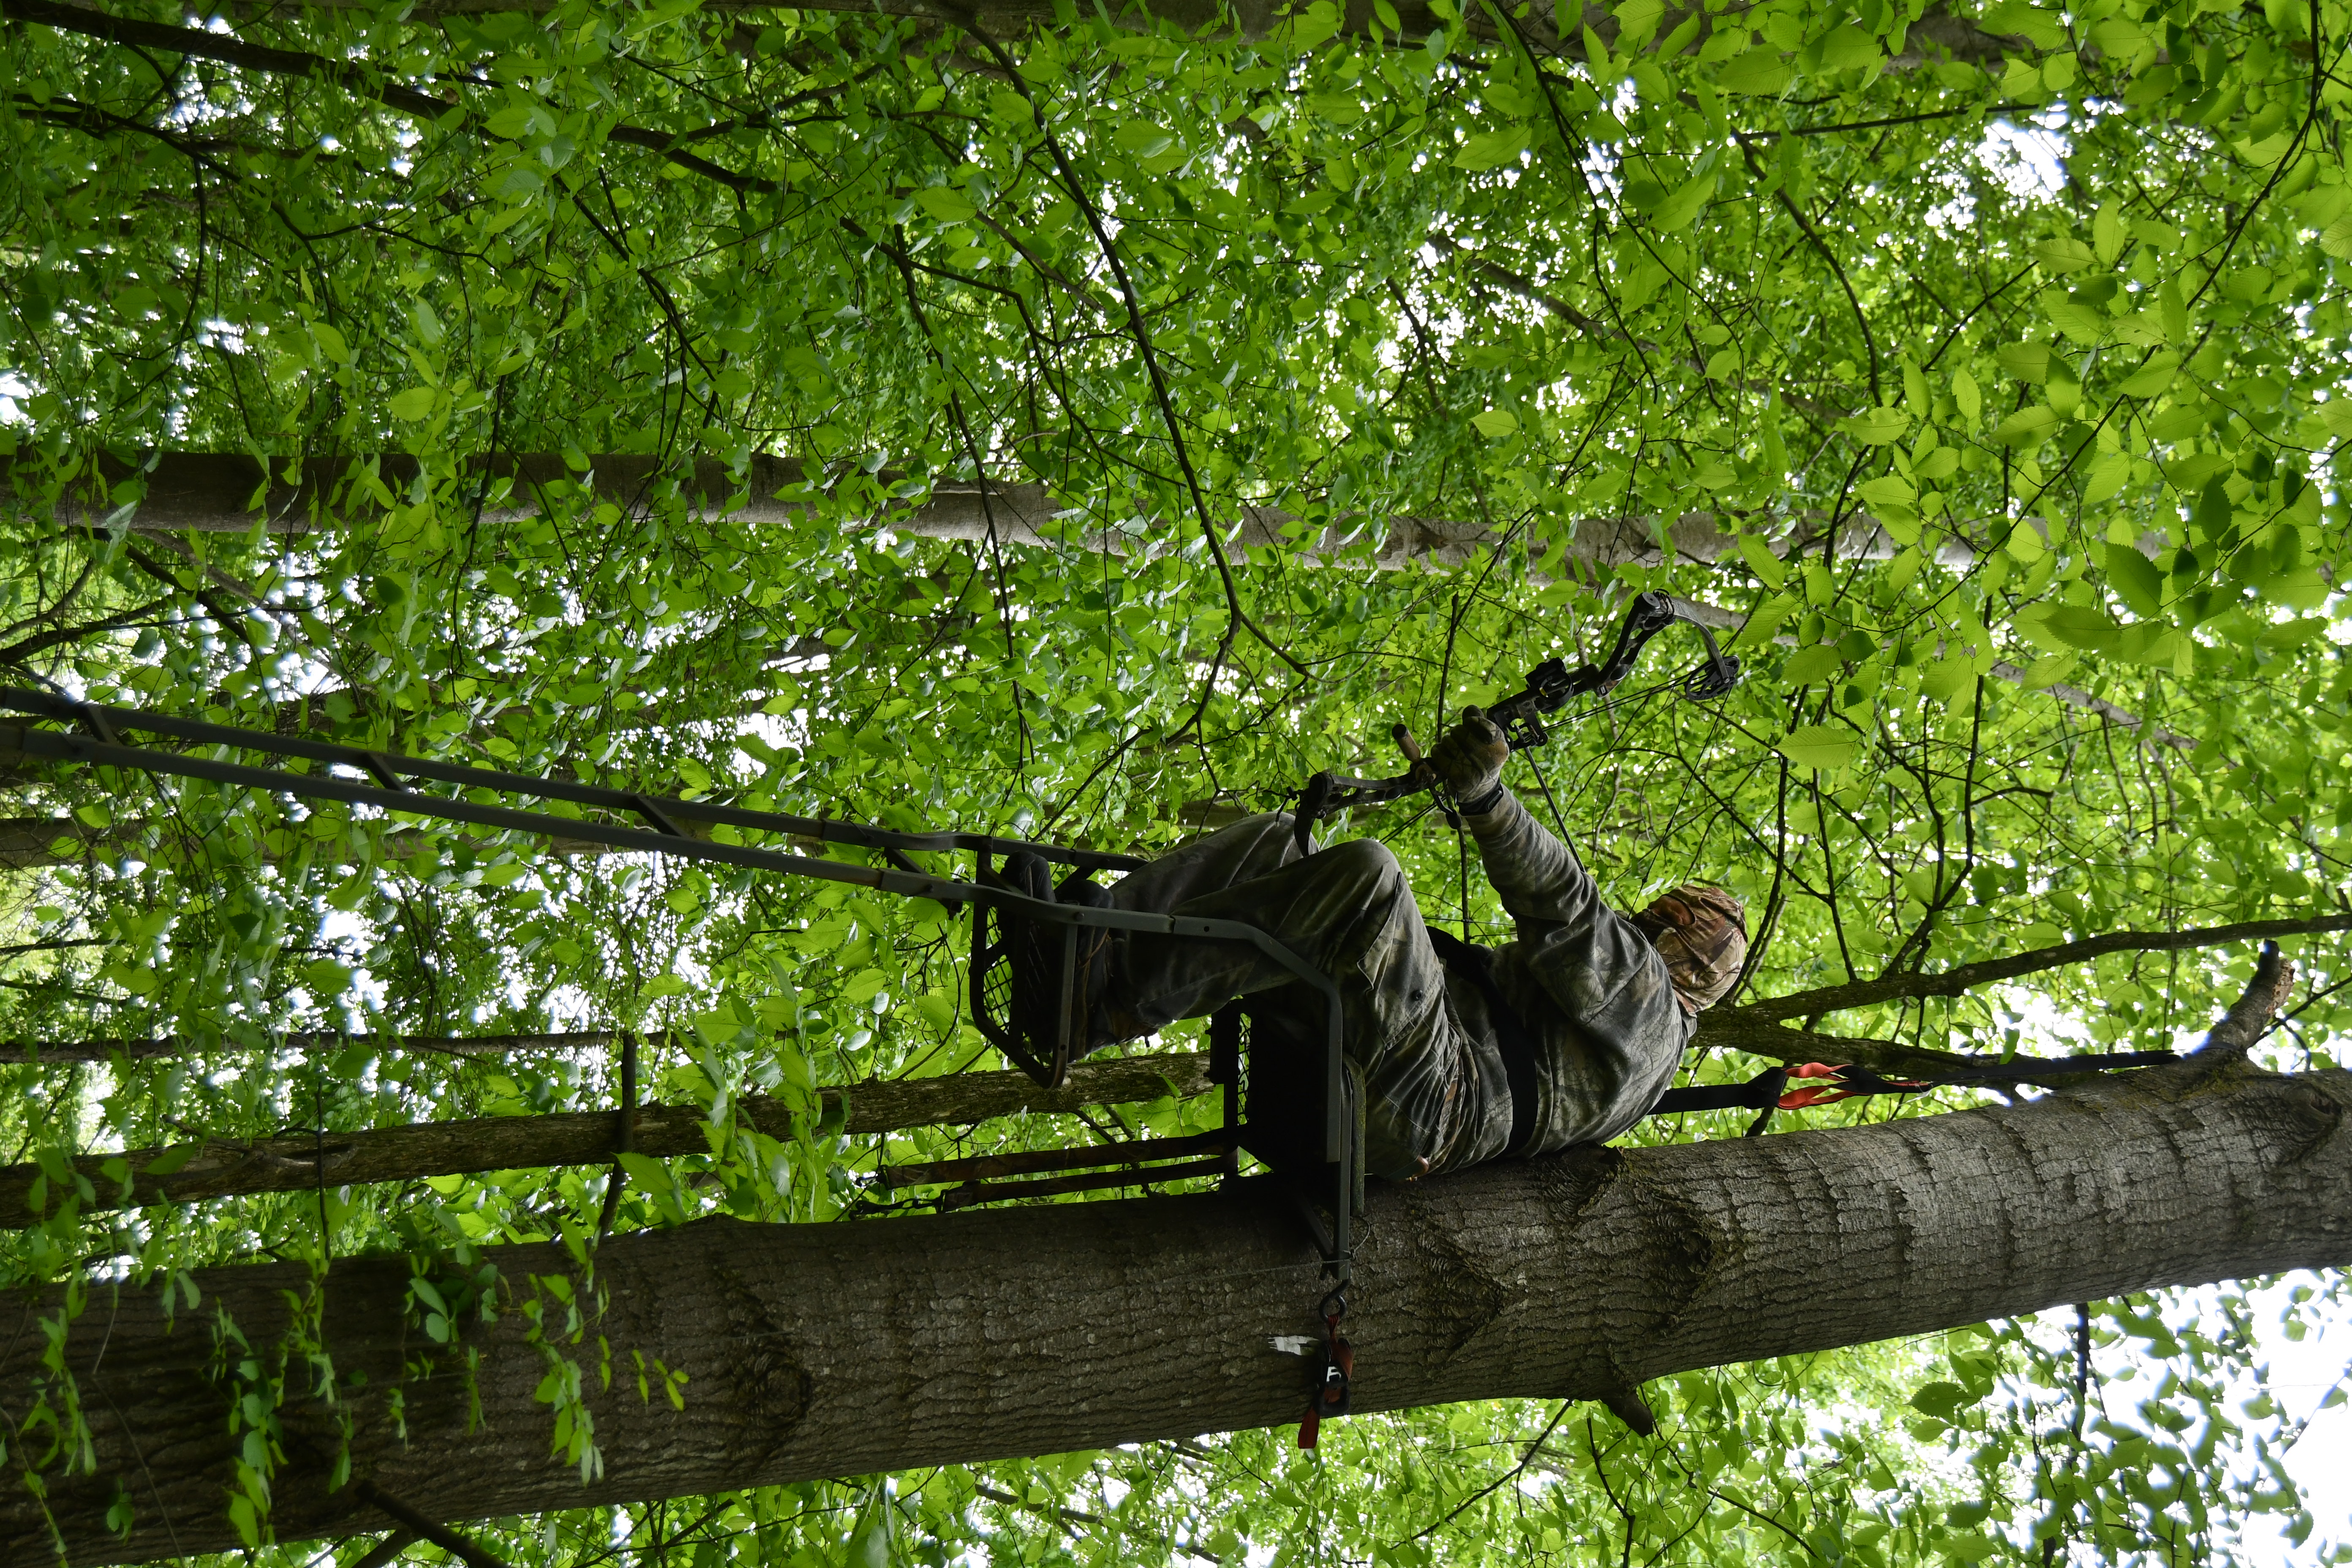
A friend that had never killed a deer with his bow was in one stand while I was in the other with my camera.
Things got exciting when a tall six point came walking through. I had it all on tape, focusing on the deer and not so much on my friend. When I heard the bow string release, I saw the deer turn and bolt. I didn't see the hit, because my eye was trained on the area of the vitals. The second that the buck was gone, I looked at my astonished friend. He just shook his head as he struggled to catch his breath.
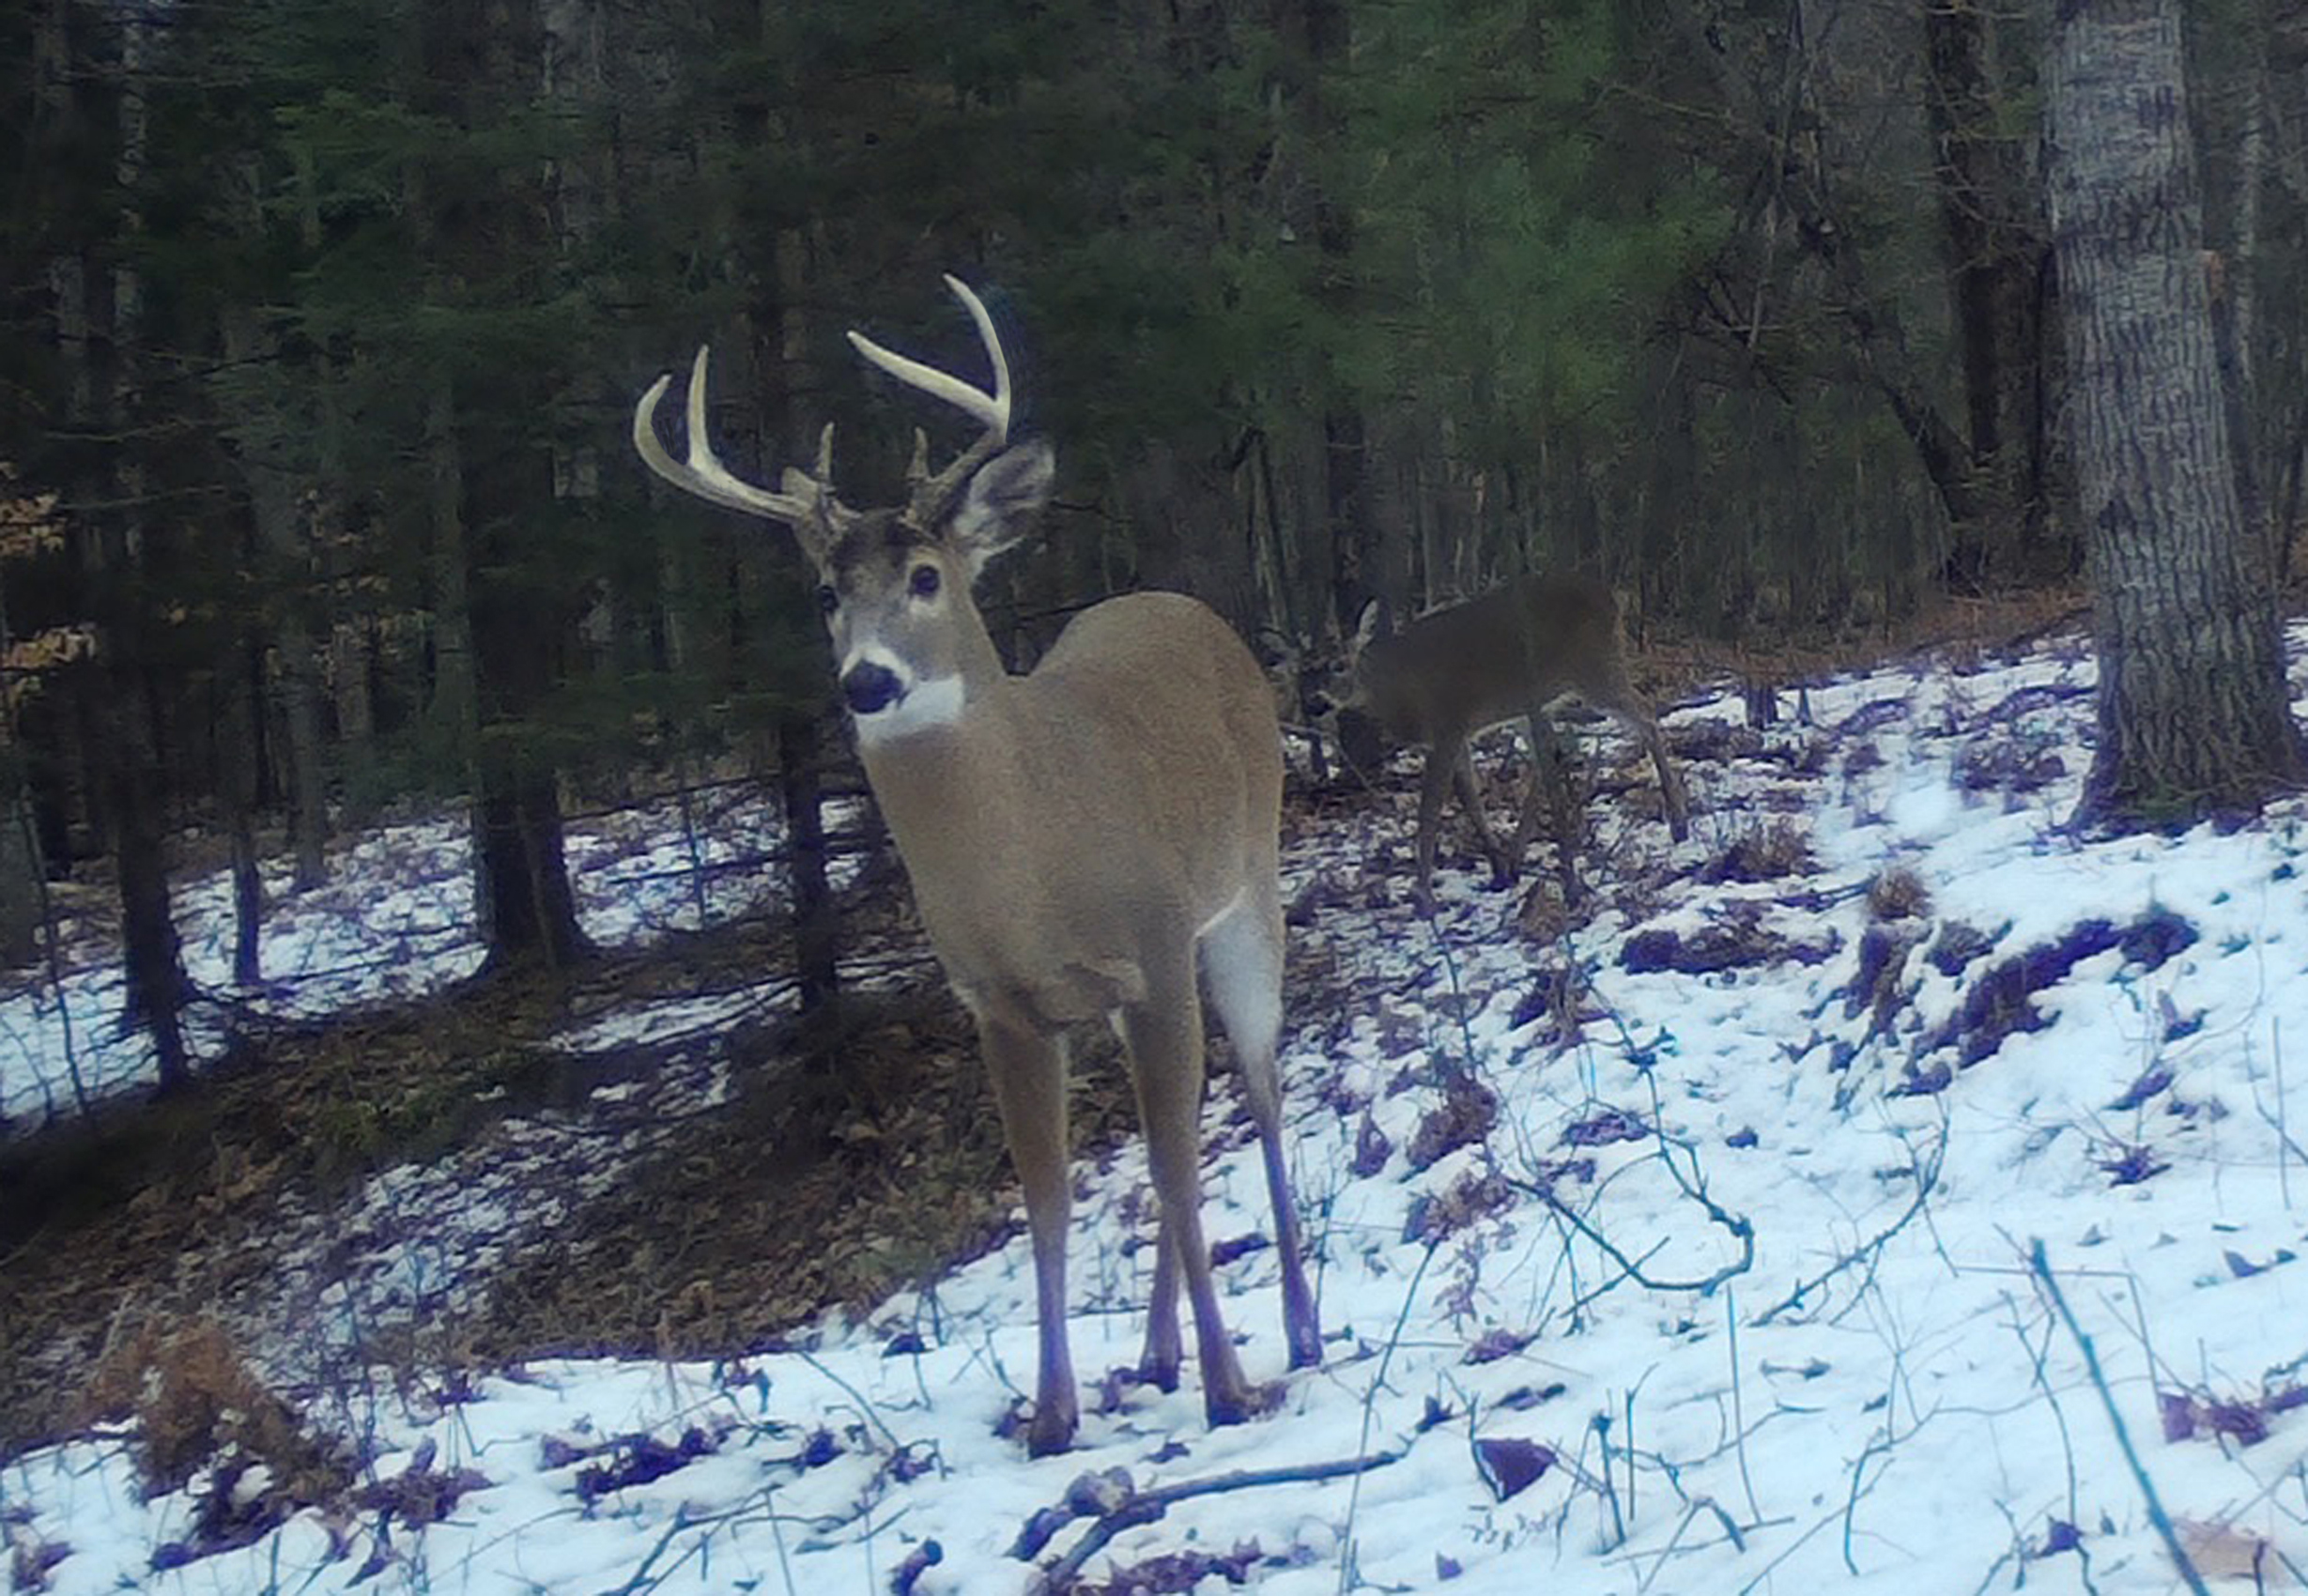
His arrow lay on the ground right near the spot that the buck was standing. He hadn't missed the deer, but he did miss hitting the vitals. In his excitement, he made a mistake and it was captured on video. The playback on the small viewfinder showed the arrow rattling its way through the antlers on the animal's head! He got excited, focused on the rack instead of the target - just one of the things that can go wrong when using a bow.
Understanding Buck Fever
What happened to my friend in that stand is something every hunter has felt. We call it "buck fever," but it's more than just excitement. It's a full-blown physiological event. When that buck walked in, his brain was flooded with adrenaline, triggering a fight-or-flight response that has been hard-wired into us for millennia. His heart rate skyrocketed, his breathing became shallow, and fine motor control went out the window.
"Buck fever has saved many a buck's life and can strike both experienced and new hunters""
Dan Branagan
In that moment, his brain wasn't thinking about proper form; it was screaming "BUCK!" That single, overwhelming thought hijacked the hundreds of hours he'd spent practicing. He didn't aim at the vitals; he aimed at the whole deer, and his focus was magnetically drawn to the most impressive feature - the antlers.
The good news is that buck fever isn't a personal failing; it's a human reaction. The even better news is that you can learn to control it. The secret isn't to eliminate the adrenaline - that thrilling feeling is why we hunt! - but to have a system so deeply ingrained that it can override the panic. That system is called a shot process.
The Antidote:
A System to Get Back to Normal
A shot process is a mental and physical checklist that you run through on every single shot. It's a deliberate sequence of steps that takes you from the decision to shoot to the arrow hitting its mark. By consciously focusing on this routine, you occupy your brain with a familiar task, leaving no room for the panic of buck fever to take hold.
You don't rise to the occasion; you fall back to the level of your training. If your training is chaotic and inconsistent, your performance under pressure will be too. But if your training is built on a solid, repeatable process, that process will be there for you when the buck of a lifetime is standing broadside at 20 yards.
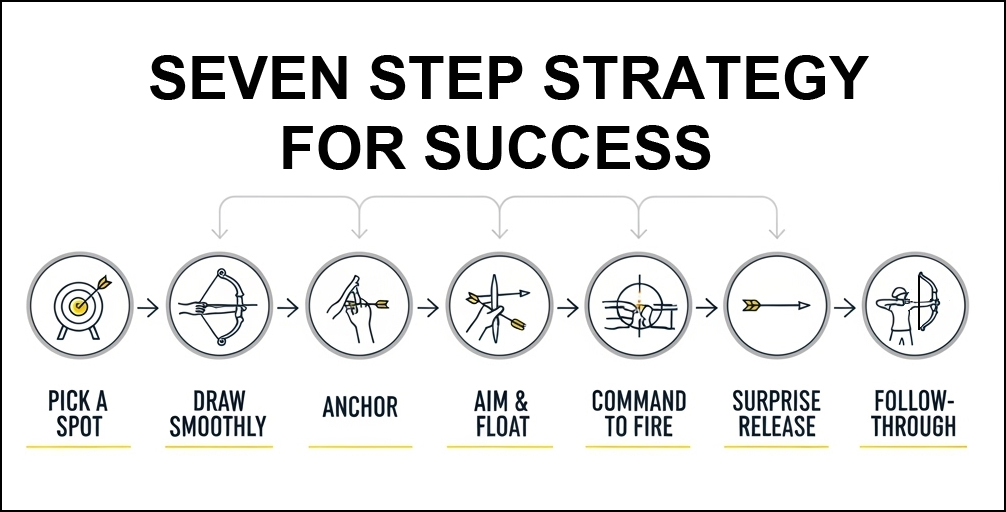
A Seven-Step Checklist to Perfection
This is the process. It's a simple, seven-step sequence that you can adapt and make your own. The key is to execute it the same way, every time.
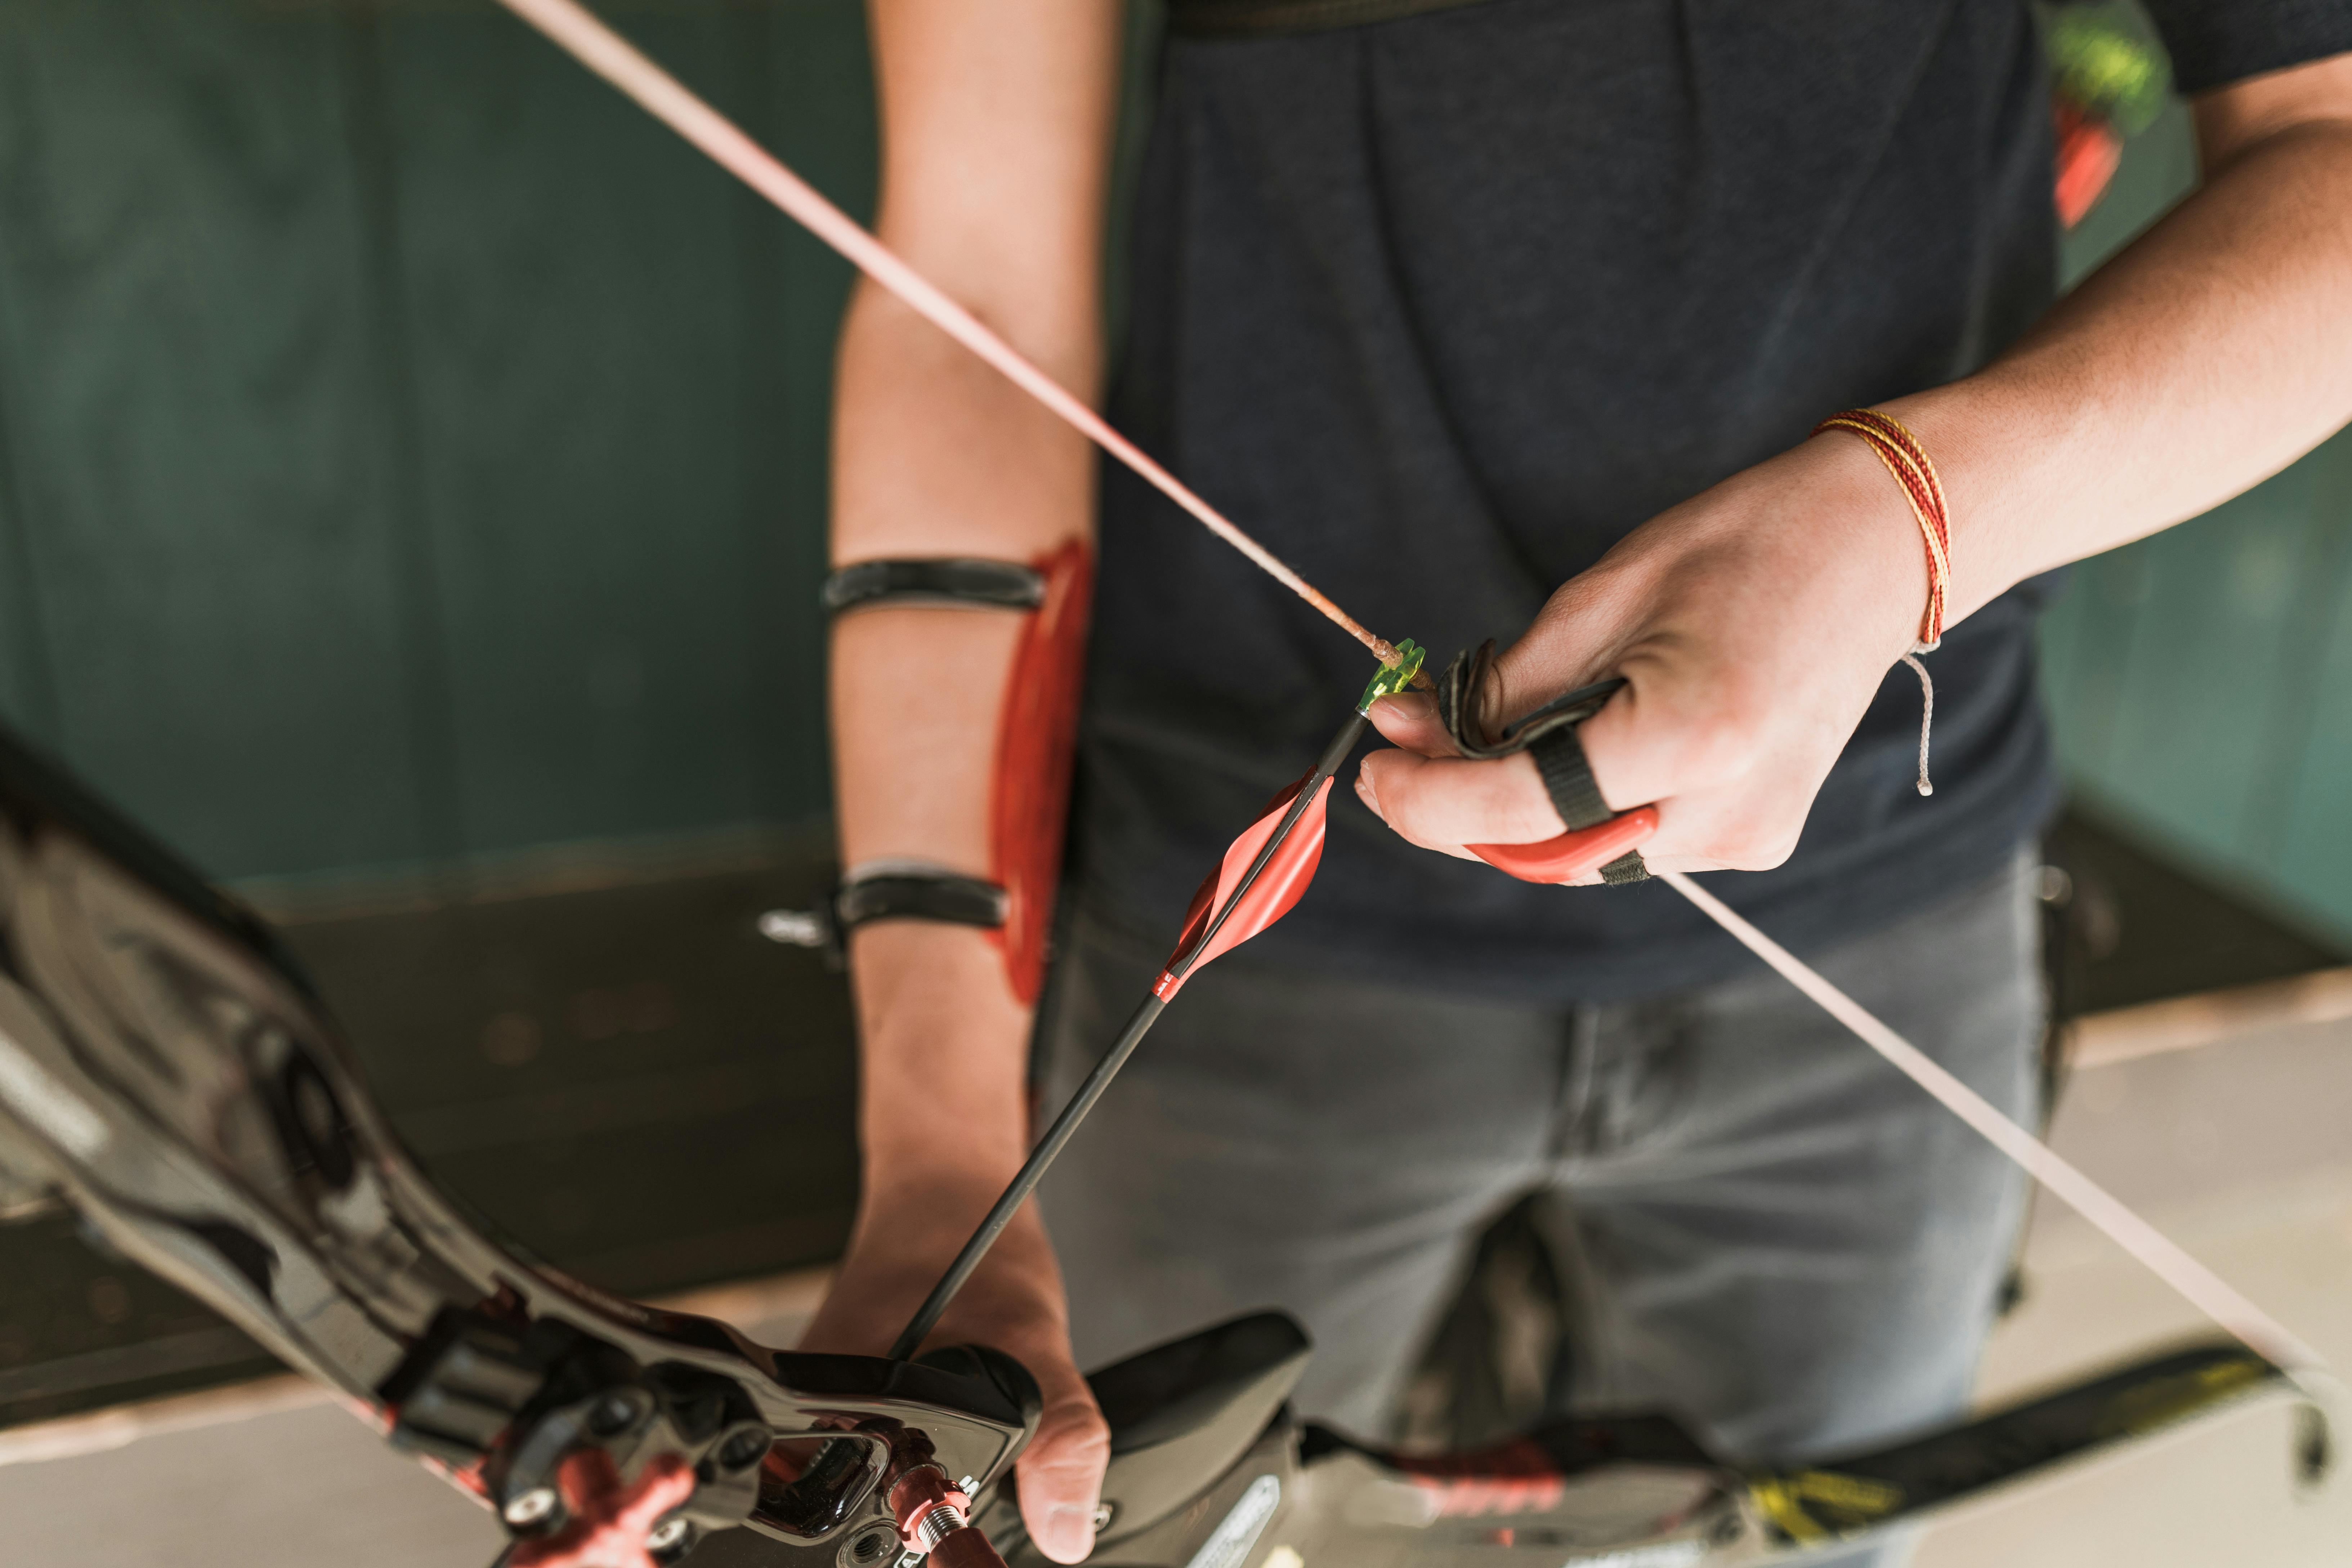
1. Pick a Spot. This is the step my friend missed. Don't aim at "the deer." Don't even aim at "the vitals." Aim for a single, tiny, specific spot. Look for a tuft of hair that's a different color, a small shadow, anything that allows you to focus your pin on a spot the size of a quarter. The old saying is true: "Aim small, miss small."
2. Draw Smoothly. When you decide to shoot, the draw should be a calm, controlled motion. Don't rush it or jerk the bow back. A smooth draw keeps your muscles relaxed and prevents you from alerting the deer.
3. Find Your Anchor. This is the bedrock of consistency. As you come to full draw, bring your release hand to the *exact same spot* on your face, every single time. Whether it's your index finger knuckle tucked behind your jawbone or the string touching the tip of your nose, this anchor point must be identical on every shot.
Graphic: Loanna Ammerman
4. Aim and Float. Now, settle your pin on that tiny spot you picked out. Your pin is going to move - it's going to "float" around the target. This is natural. Do not try to fight the float or punch the trigger the second the pin crosses the spot. Just accept the float and keep your focus on the spot itself.
5. Command to Fire. This is the conscious mental green light. Your anchor is set, your pin is floating on the spot. Now, tell yourself to begin the release. This isn't a command to "SHOOT NOW!" It's a command to start the final, subtle step of the process.
6. Surprise Release. A perfect archery shot should be a surprise. Instead of consciously deciding to hit the trigger, simply continue aiming at your spot while applying slow, steady pressure to the trigger with your finger or back tension with your shoulder muscles. The shot will break cleanly without you anticipating it, preventing you from jerking the bow at the last second.
7. Follow-Through. This is the step that separates good archers from great ones. After the arrow is gone, don't immediately drop your bow arm to see where it went. *Keep aiming*. Hold your bow up, pointed at the target, until you see the arrow hit home. This simple act ensures you don't move the bow during the critical milliseconds that the arrow is still on the string, and it solidifies good shooting form.
Making it Automatic
Practice with Purpose
Reading this list is easy. Owning it takes work. The key to making this process second nature is to practice it with purpose. Every single time you nock an arrow in your backyard, go through these seven steps. Say them in your head as you do them: "Pick a spot... smooth draw... find my anchor..."
Don't just fling arrows at the target. Make every arrow a deliberate, thoughtful repetition of your shot process. Do this a hundred times, and it will start to become muscle memory. Do it a thousand times, and it will become so automatic that you won't be able to shoot any other way.
When that October evening comes and the six-pointer - or the ten-pointer - steps into your lane, you won't have time to think. And you won't have to. Your body and mind will take over, falling back on the thousands of perfect repetitions you built in the summer sun. The adrenaline will still be there, but it will be a passenger, not the pilot. You'll be in control, and you'll master the moment.