The Clean Gut: A Guide to Field Dressing with Less Mess
My co-worker, Dan Seitz, and I were tracking a deer I'd just shot with my bow. As I got my knife out to field dress the deer, Dan pulled out a piece of paper out of his hunting vest. He slowly unfolded it and it turned out to be a "How to Field Dress a Deer" article from an old Field and Stream magazine.
"I've been saving this for this very occasion," he proudly stated.
I thought he was joking, but he wasn't. I told him to put it away, stand back, watch, and learn. Although he may have been a novice, this wasn't my first field dressing event. I'm pretty good with a bow and I knew how to gut a deer!
The whole process took me a little longer than I cared for, but I knew that he was listening to my every word, watching every little cut I made, and was preparing for his turn one day. I was fortunate enough to have a father that showed me the ropes when it came to gutting a deer. I realized then that not everybody was as fortunate.
Decades have passed since that hunt. Dan and I drifted apart and I hope that he's still in the woods each fall and has his field dressing technique down to a science.
It's easier to show someone how to field dress a deer than it is to tell them how to do it. I'm going to relay my technique to you now, in the hopes that someone that reads this will be like Dan and keeps the article for that special occasion in their hunting life.
The Philosophy: Work Smart, Not Messy
Before we make a single cut, let's talk about the goal. The purpose of field dressing is twofold: to begin cooling the meat as quickly as possible to preserve its quality, and to make the deer lighter and easier to drag out of the woods. The traditional "gut pile" image we all have in our heads often involves a chaotic, messy scene. It doesn't have to be that way.
My method is built on two simple principles: gravity is your best friend, and a small, sharp knife is your most important tool. Forget those giant Rambo-style survival knives. A simple 3 to 4-inch drop-point blade is all you need. A sharp knife is a safe knife; it cuts where you want it to and doesn't require excessive force, which is what leads to mistakes and punctures. By using gravity and making a series of precise, deliberate cuts in the right order, we can make the entire process cleaner, faster, and far less intimidating.
Pre-Game Prep: The Tools for the Job
You don't need a mobile butcher shop in your pack. Keep it light and simple. Here's all you really need:
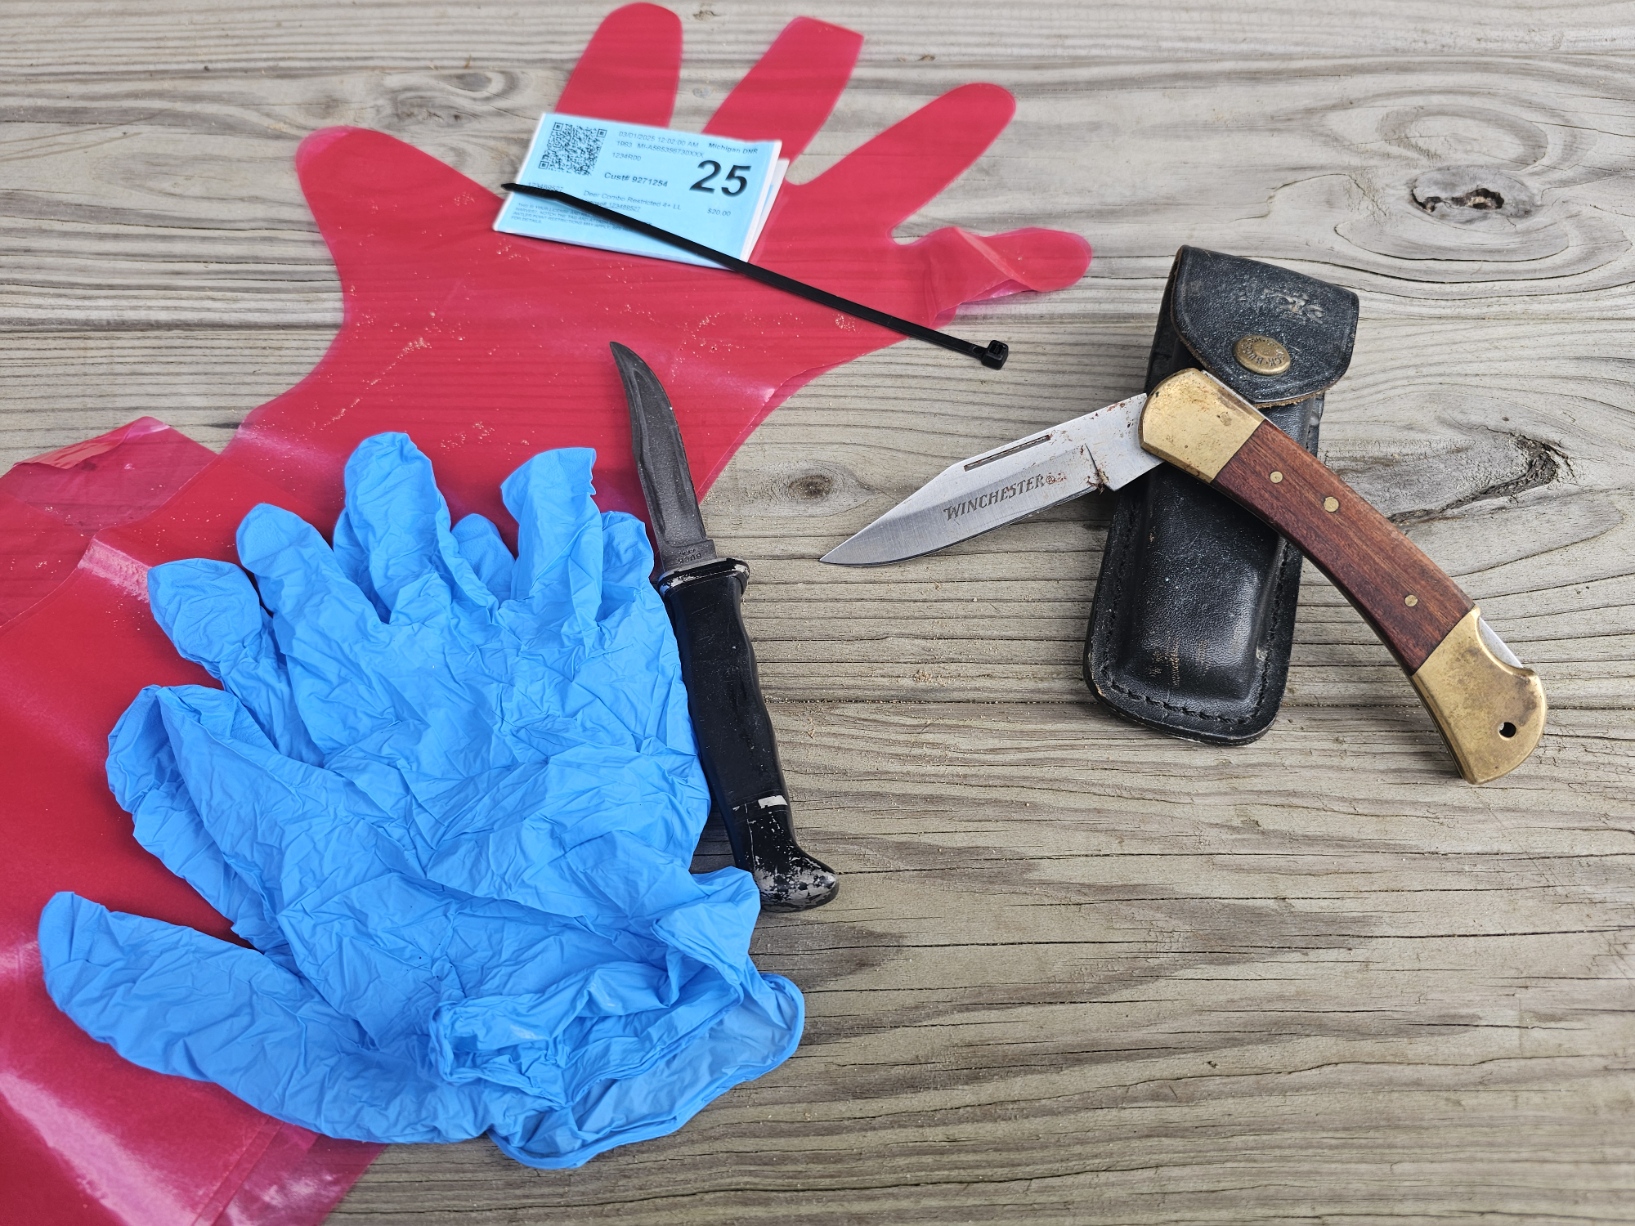
1. A Sharp Knife: I can't say this enough. Test it on paper before you leave the house. If it doesn't slice cleanly, sharpen it.
2. Gloves: A pair of longer, shoulder-length field dressing gloves. These will be loose fitting and some people put a rubber band around their upper arm to keep them from sliding down as they work. A pair of disposable latex or nitrile gloves go over these thin gloves. I bought mine using this link.
This is the number one secret to walking away clean.
3. A Short Piece of Rope or a Zip Tie: This is for a crucial step we'll cover in a moment.
4. Your Deer Tag: The very first thing you should do, before any of this, is fill out and attach your tag according to Michigan DNR regulations. Don't just make a slit where you identify the date and deer details. Notch it out and make sure that your little bitty triangle is visible on the corresponding details. Do it first so you don't forget.
That's it. Some guys like a small bone saw for splitting the pelvis or brisket, but for this method, it's not necessary. The optional "Butt Out" tool is also a handy gadget that speeds up one of the steps, but you can get the job done without it.
The Step-by-Step Guide to a Clean Gut
Alright, the tag is on, your gloves are on, and the deer is down. Let's begin.
Step 1: Position the Deer (Let Gravity Help)
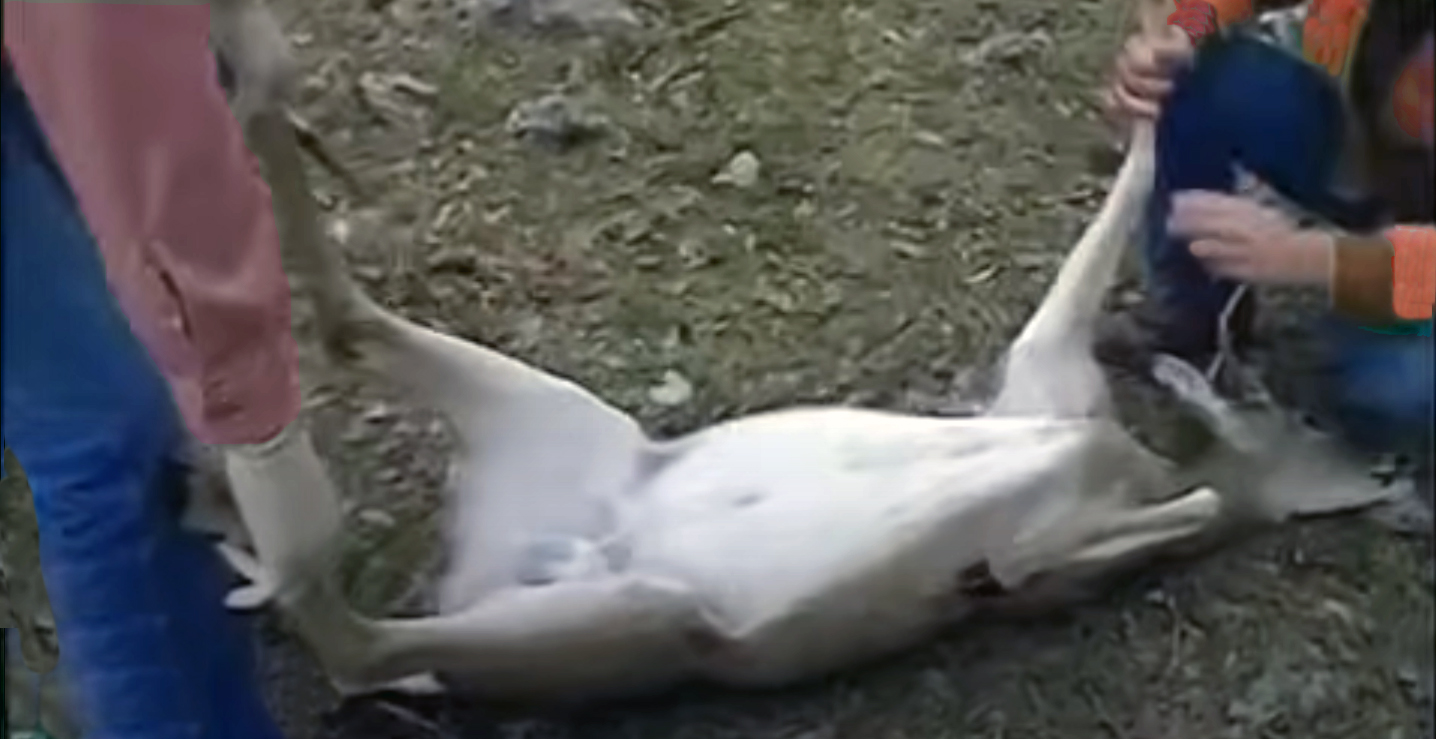
Find the best spot you can and position the deer on its back. Ideally, you want its head and shoulders pointing uphill. This makes gravity work for you, encouraging the entrails to settle down and away from the chest cavity you'll be working in. It also helps the body cavity drain once you're done. Spread the back legs apart to give yourself clear access to the underbelly.
Step 2: The Keystone Cut (Coring the Backside)
This is the single most important step for a clean job, and it's the one most people get wrong or are afraid of. We are going to disconnect the terminal end of the intestine *before* we open the body cavity. This prevents any contamination from feces later on.
Take your sharp knife and carefully cut a circle around the anus, about an inch deep, just like you would core an apple. You're cutting the hide and the muscle tissue connecting the colon to the body. Once you've cut all the way around, reach in with your fingers and gently pull the tube out a few inches. Now, take that piece of rope or a zip tie and tie it off tightly. This effectively seals the system. Push the tied-off tube back into the body cavity. You've just disconnected the "sewer pipe," and it's now floating freely inside.
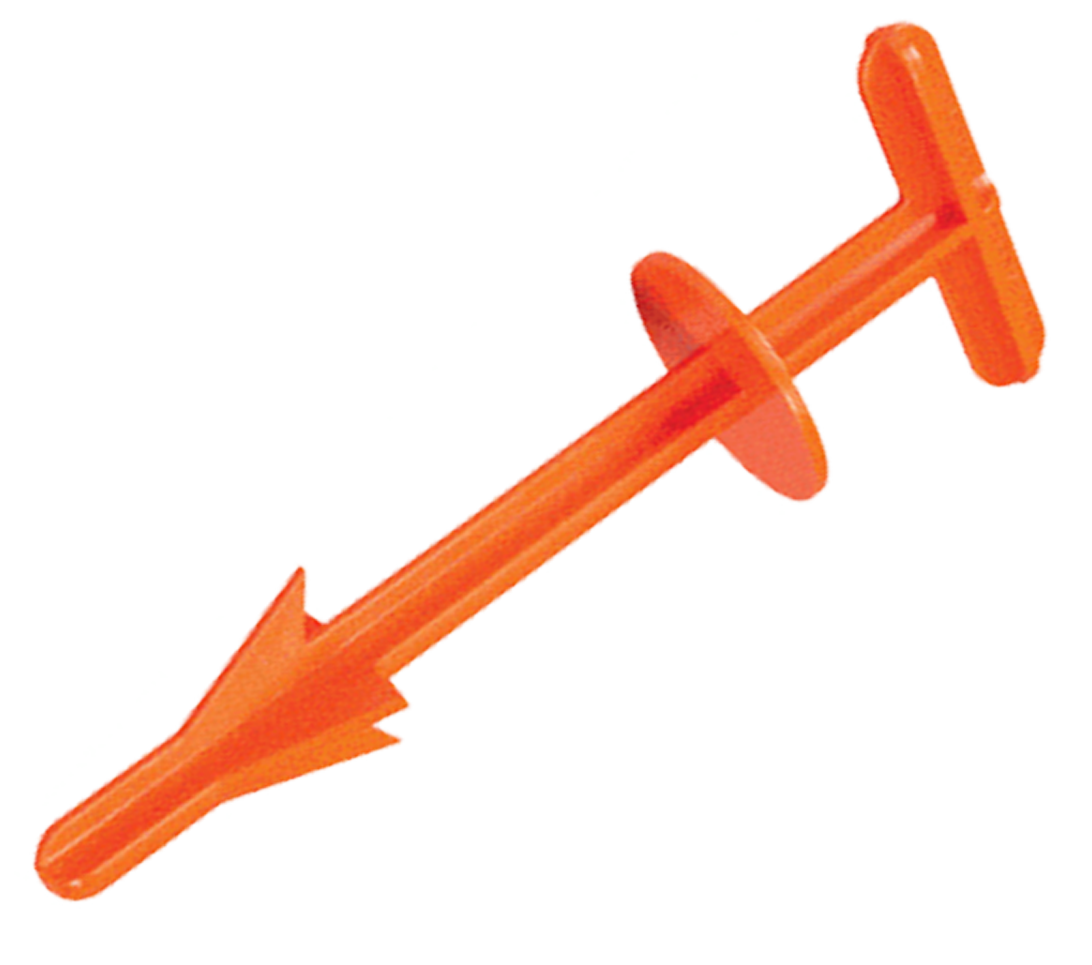
If you want to make this step almost foolproof, consider investing in a Butt Out tool. This simple tool is a T-shaped device that does a really nice job. Insert it, give it a twist, and pull out a foot or so of the colon. It comes out free and clean! Tie off the colon with a piece of string or use a zip tie. When you open the main cavity in the next step, there will be zero contamination and you can easily pull the remaining colon right out!
This process leaves no guesswork, no awkward knife angles, and zero chance of cutting too shallow or nicking something you shouldn't. I paid about ten bucks using this link, and now it's become a permanent piece of my kit. That said, the knife method works perfectly fine - the one problem with the Butt Out Tool is that I tend to forget to grab it in the excitement of tracking my deer!
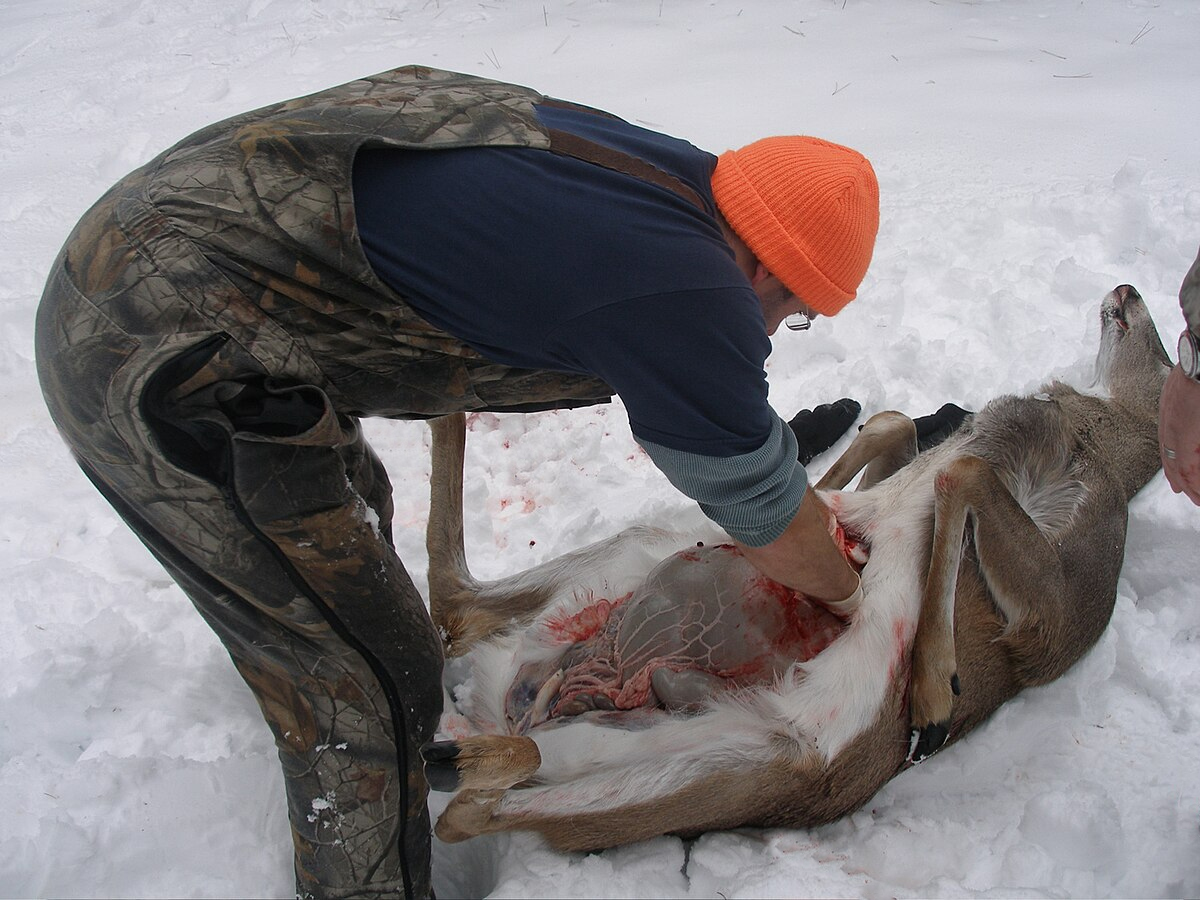
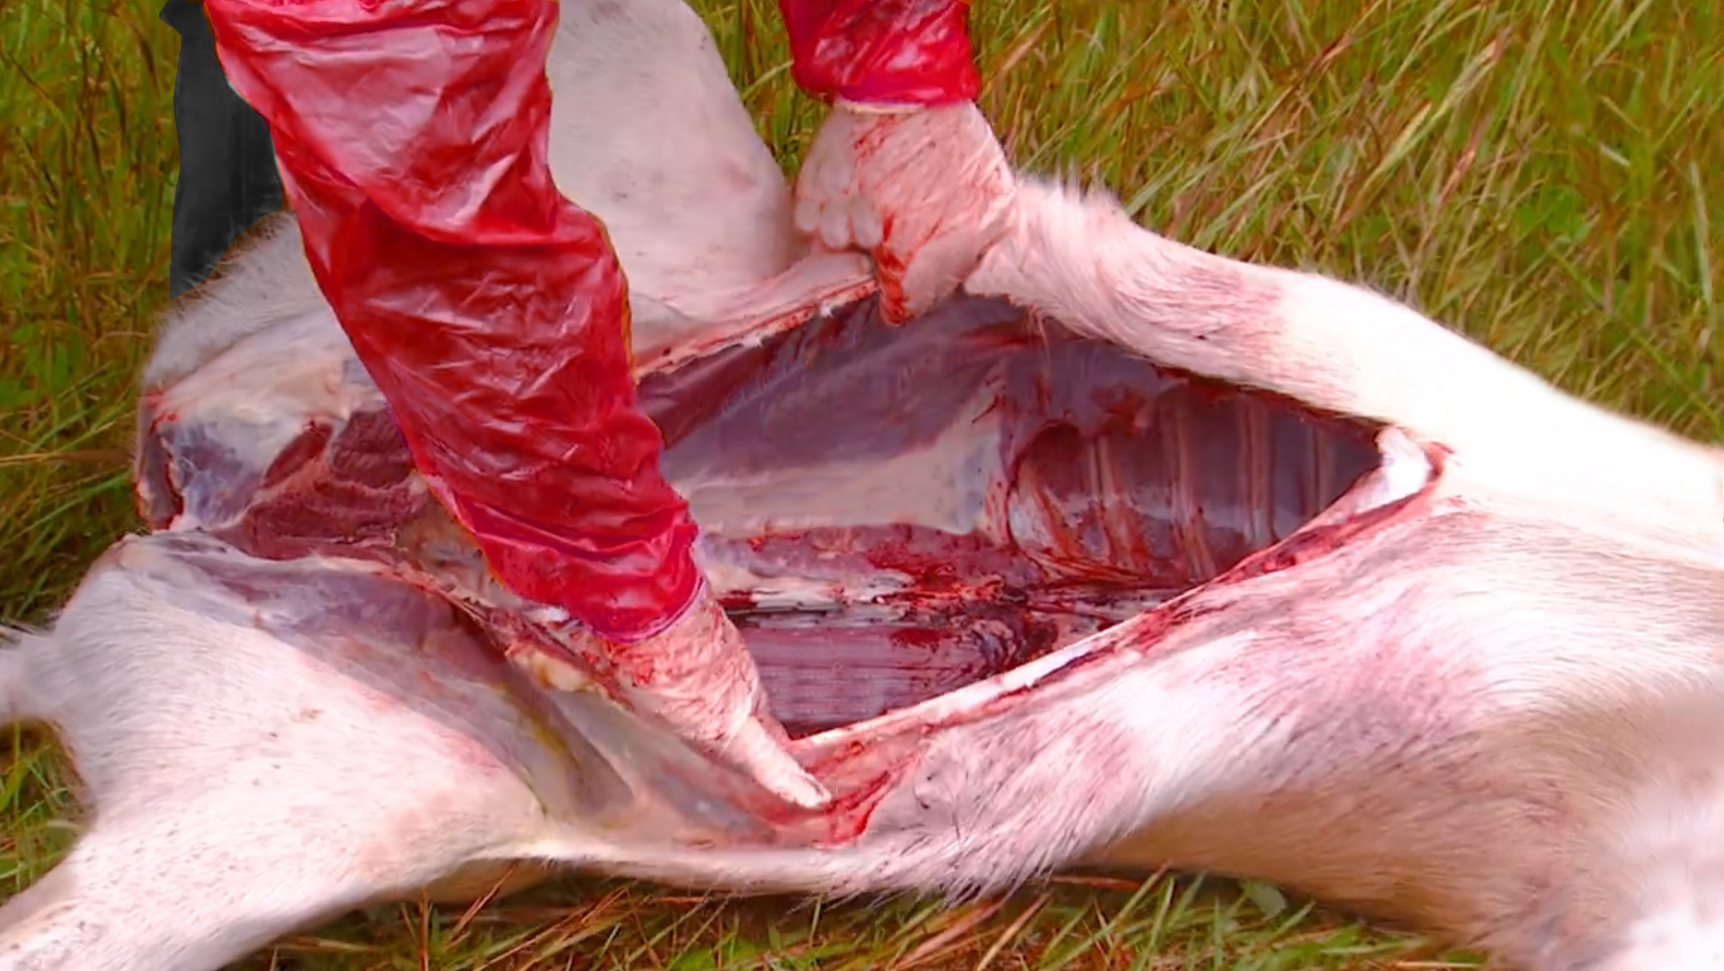
Step 3: Opening the Main Cavity
Now it's time for the main incision. Go to the deer's sternum, right where the soft belly meets the hard breastbone. Make a small, careful initial cut, just through the hide and the muscle wall. Do *not* plunge the knife in.
Once you have a small opening, put your knife away for a second. Insert the index and middle fingers of your non-dominant hand into the hole, palm up. Use these two fingers as a guide, lifting the body wall up and away from the paunch (stomach) and intestines underneath. Now, take your knife, place the blade between those two fingers with the sharp edge facing up, and make a long, clean cut from the sternum all the way down to the pelvis. Your fingers act as a shield, preventing you from puncturing the gut sack, which is the number one cause of a stinky, messy job.
Step 4: Reaching Up High (The Diaphragm and Windpipe)
This is where you free the upper organs. The diaphragm is a muscular wall that separates the chest cavity (heart and lungs) from the abdominal cavity (stomach, intestines). It looks like a thin membrane attached all along the inside of the ribs. Reach into the body cavity and cut the diaphragm free from the rib cage on both sides.
Now for the final connection point. Reach as far forward into the chest cavity as you can, up toward the neck. You'll feel a bundle of tubes. This is the esophagus (food pipe) and the trachea (windpipe). You don't need to see them. Just gather them in your hand and, being very careful of your fingers, sever them with your knife as high up as you can. Once you cut these, everything is now disconnected.
Step 5: The Roll-Out (Gravity Does the Work)
Here's the magic moment. With the deer on its back, simply grab the hide on the far side and roll the deer slightly away from you, down the hill if possible. Because you've severed all the connections at the top (windpipe) and bottom (anus), the *entire* gut pile---lungs, heart, stomach, and intestines---should roll out onto the ground in one clean, contained unit. No scooping, no pulling, no mess.
You can now easily reach in and retrieve the heart and liver if you wish. The liver should be a dark, uniform maroon color. The heart is obvious. Place them in a plastic bag if you have one to keep them clean. Be careful not to lay these organs on leaves that are on the ground. For some reason, those leaves stick to the meat like they were glued on!
Step 6: The Final Touches and Drainage
With the cavity empty, roll the deer back onto its stomach or prop the body cavity open with a stick to allow air to circulate and any remaining blood to drain out. This is the crucial first step in cooling the meat. The faster it cools, the better it will taste. Now you're ready for the drag out.
💡 Pro Tip
Some hunters use a small saw to cut through the pelvis while they are field dressing a deer. I wait until the deer is back at camp and hung up. It makes it much easier to cut it. Splitting the pelvis doesn't aid in field dressing. It's simply to help open the cavity, allowing it to cool and dry.
Dan's Lesson: A Final Thought
When I was done showing Dan, the area was surprisingly clean. There was a single, neat pile of entrails, and the deer's body cavity was empty and ready to cool. He looked at the scene, then at his folded-up magazine article, and I could see the lightbulb go on. It wasn't a mystical, messy ritual. It was a process. A series of logical steps that, when done correctly, produce a clean and efficient result.
Field dressing a deer can be intimidating, but it doesn't have to be. Practice the steps in your mind. Trust your sharp knife, use gravity, and the next time you're standing over your harvest, you won't need an article in your pocket. You'll just know what to do.
Good luck, hunt safe, and may your knife need sharpening often.