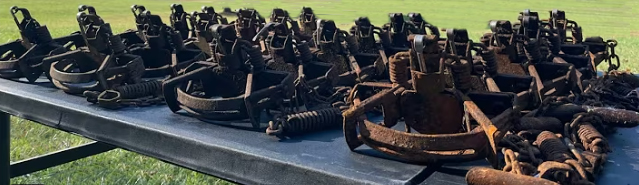
I look forward to trapping season, but I don't care too much for repairing and maintaining my traps. It's easy to put off - you start a small pile of traps that need a little tuning, maybe a dye job, or perhaps a better swivel. As the season goes on, as long as you have enough spare traps, that pile seems to grow a bit.
"It's no big deal," you say to yourself. "I'll get to them after the season." The only trouble with that logic is that right after the season, it's time to deal with the fruits of our labor - the furs!
By the time the furs have been taken care of (stored, sold, or otherwise,) it seems that the nicer weather sets in and that pile of traps takes a back seat to other things that seem more important to do. Chances are, like I have done for many years, that pile will be waiting for me as trapping season sneaks back up on us the following fall.
Throughout the years, I have started to take care of my equipment's issues as soon as possible. I've found this to be the easiest as far as getting it done, but certainly not as easy as putting the job off for months!
With a little trap maintenance and a few quick repairs, trappers can spend more time on the trapline and less time worrying about a growing pile of malfunctioning traps.
Breaking the Cycle: A Three-Phase Approach
The secret to beating that growing pile of rusty iron isn't a magic bullet; it's a simple change in mindset. Instead of one dreaded, monolithic "trap prep" event, think of your maintenance in three distinct phases: Post-Season Put-Away, Pre-Season Overhaul, and In-Season Triage. By tackling small jobs at the right time, the whole process becomes manageable and, dare I say, even enjoyable.
The most neglected phase is Post-Season Put-Away. This happens the day you pull your last trap. Before you hang them up, take an hour to knock off the mud, wash them down with a hose, and identify any obvious issues - a bent dog, a weak spring, a kinked chain. Make a quick note or separate the problem traps. A little work now prevents rust from seizing parts and saves you a major headache in the fall.
The Pre-Season Overhaul is what most of us think of as "trap prep." This is your late summer or early fall push. It's the time for the heavy lifting: dyeing, waxing, major repairs, and modifications. It's when you turn your attention to that pile of traps you set aside and get your entire arsenal in perfect working order.
Finally, there's In-Season Triage. This is the quick, on-the-fly maintenance you do on the tailgate of the truck. A trap gets sprung by a deer and the dog gets bent? Fix it right there. A swivel gets clogged with mud? Clean it out before resetting. This prevents minor issues from becoming trap-disabling problems and keeps your sets working at peak efficiency when it matters most.
The Core Four of Trap Maintenance
Every trap, whether it's brand new out of the box or a seasoned veteran, needs to go through a process to make it ready for the field. I call it the "Core Four": Degreasing, Rusting, Treating, and Tuning.
1. Degreasing: The Clean Slate
New traps are coated in a fine layer of oil from the factory to prevent rust during shipping. Old traps are covered in last year's wax, dirt, and who-knows-what-else. Both need to be stripped completely clean. This step is non-negotiable.
If you try to dye and wax over oil or grime, the coating won't stick, your traps will rust excessively, and they'll carry foreign odors to your set.
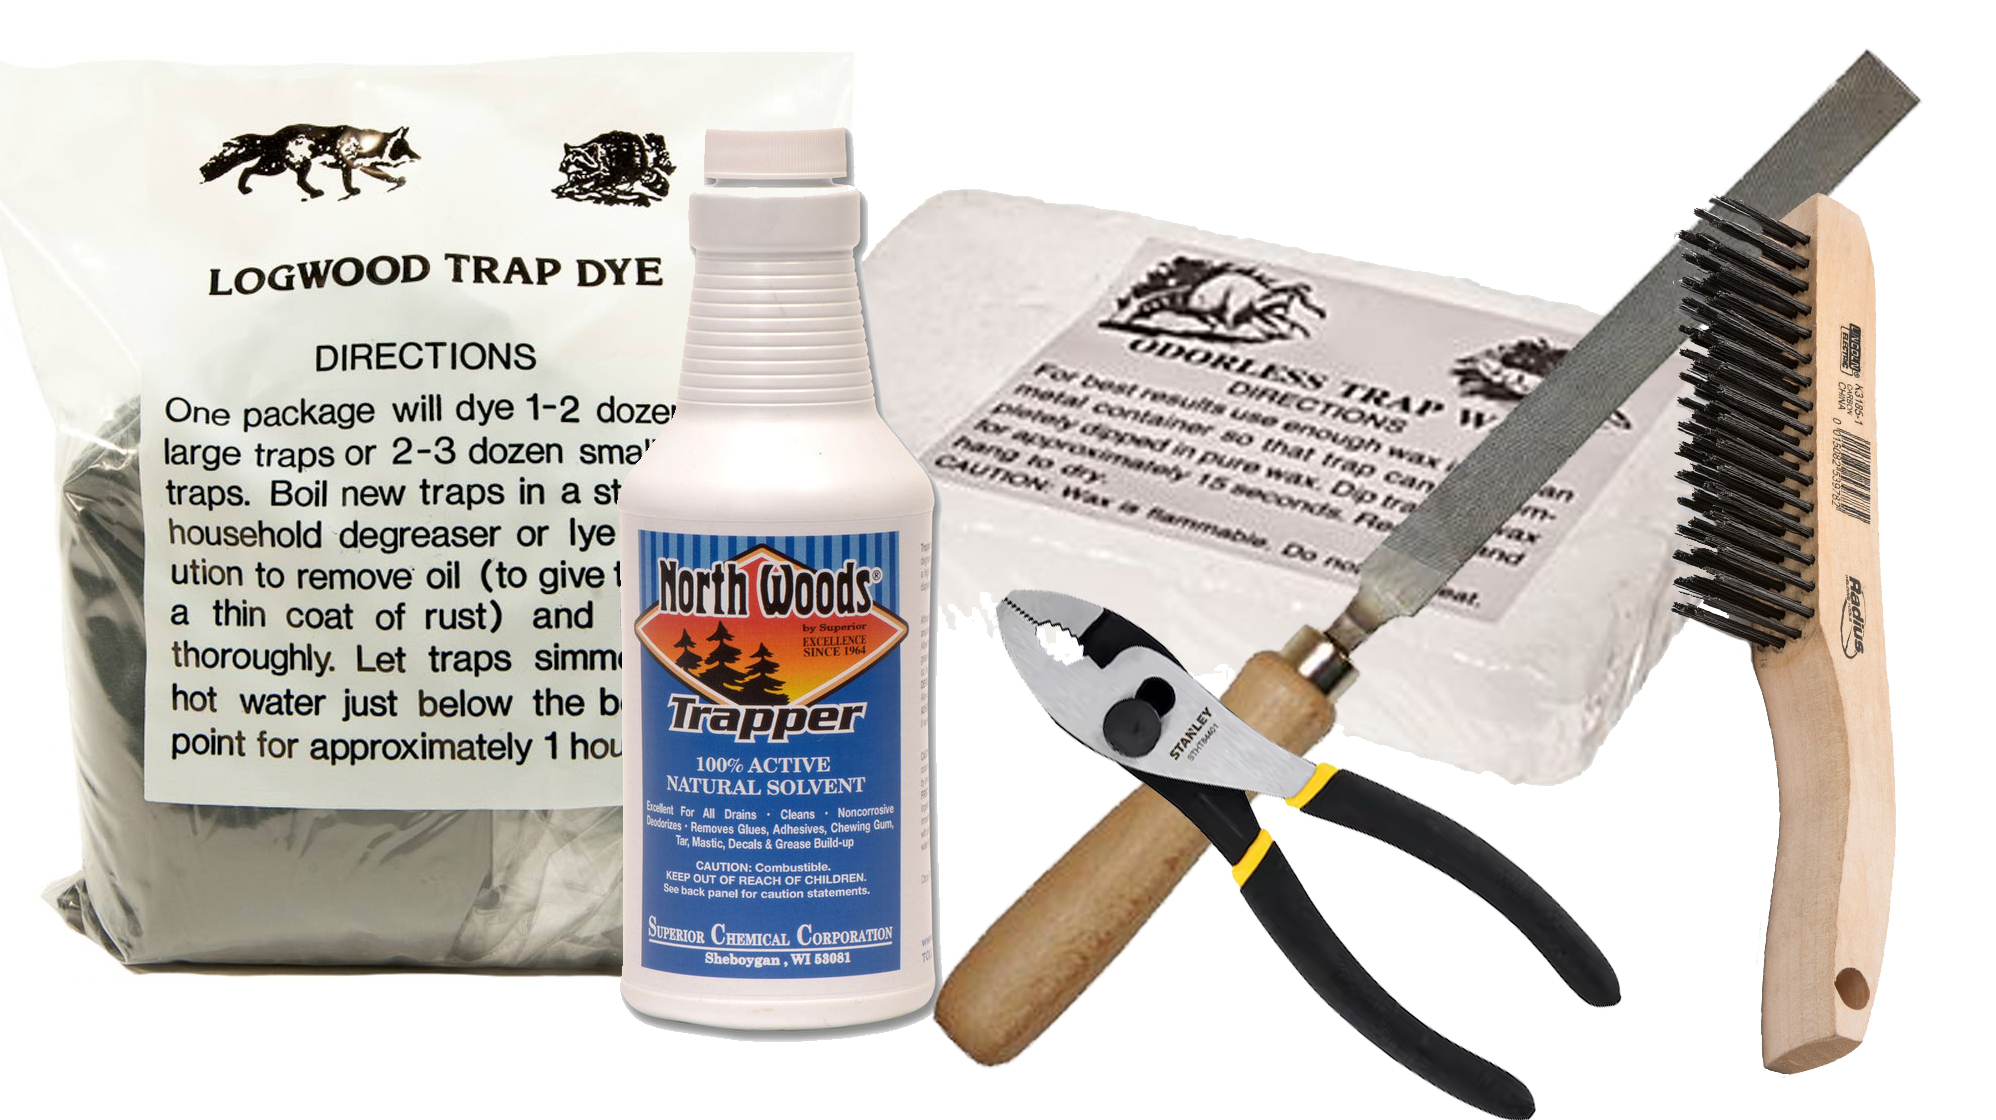
The easiest method is to boil them. In a large metal drum or pot (that you will *never* use for cooking), bring a pot of water to a boil and add a strong degreaser. Lye is the old-school standard, but be extremely careful with it - it's caustic.
A safer, effective alternative is a heavy-duty degreasing soap like Dawn or a commercial trap cleaner. Boil the traps for about 30-45 minutes, then pull them out and give them a thorough rinse with a power washer or a high-pressure hose nozzle. They should be squeaky clean.
2. Rusting: A Controlled Corrosion
This might sound counter-intuitive, but you want your traps to have a thin, even coat of rust. Don't think of the flaky, metal-eating rust that destroys old cars. Think of it more like a patina. This light layer of surface rust does two things: it gives the trap a dull, natural camouflage color, and it creates a porous surface for your dye and wax to adhere to.
After degreasing, simply hang the traps outside for a week or two. A few rainstorms or even a periodic spray with a salt water solution will give you that perfect, light-orange coating.
Vinegar is a proven way to jump-start surface rust on traps. I've used it myself with great success, and it works faster than letting nature take its course.
3. Treating: Dye and Wax for Speed and Protection
Once you have that light rust, it's time to lock it in and protect the trap. This is a two-step process: dyeing and waxing.
Dyeing: The purpose of dye is to neutralize the rust and turn the trap a dark, chocolate-brown or black color. The tannins in the dye react with the rust and form a stable layer that inhibits further corrosion.
Logwood chips or powder are the traditional choice, but many excellent commercial dyes are available. Boil your traps in the dye solution for about an hour until they take on a deep, dark color. Pull them out and let them dry completely. They should not be sticky.
Waxing: This is the final protective coat. A thin layer of odorless trapping wax waterproofs the steel, prevents it from freezing into the ground, and - most importantly - lubricates the moving parts. A waxed trap is a fast trap. Make sure you use a dedicated pot to melt your wax - don't say I didn't warn you!
Stay Safe!
Never melt wax indoors or over an open flame; the fumes are flammable, and a wax fire is incredibly dangerous. Use an outdoor propane burner.
Once the wax is melted (around 250-280 degrees Fahrenheit), submerge your dry, dyed traps for a few minutes until the trap itself is the same temperature as the wax (it will stop bubbling). Pull it out slowly, let the excess drip off, and hang it to cool. The result should be a very thin, hard, non-greasy coating.
4. Tuning: The Art of the Perfect Set
This is what separates a good trapper from a great one. Tuning is all about making your trap fire consistently and effectively every single time.
- Pan Tension: This is the amount of pressure required to fire the trap. You don't want it to be a hair-trigger that a mouse can set off, nor do you want a coyote to have to do a stomp-dance on it. For fox and coon, aim for about 2-2.5 pounds of tension.
For coyotes and bobcats, 3-4 pounds is the sweet spot. You can adjust this by slightly bending the "dog" up or down, or by using a file to smooth the contact point on the pan notch. Test it with a pan tension tester or by hanging weights from the pan.
- Level Pan: When set, the pan should sit perfectly level with the jaws. A dipping or rising pan can cause an animal to avoid it or result in a bad foot hold. You can level a pan by carefully bending the frame or the pan shank itself.
- Tuning the trap dog: Trap dogs don't always have square, crisp edges. File the dog and eliminate any rounding or burrs that may hinder releasing the jaws.
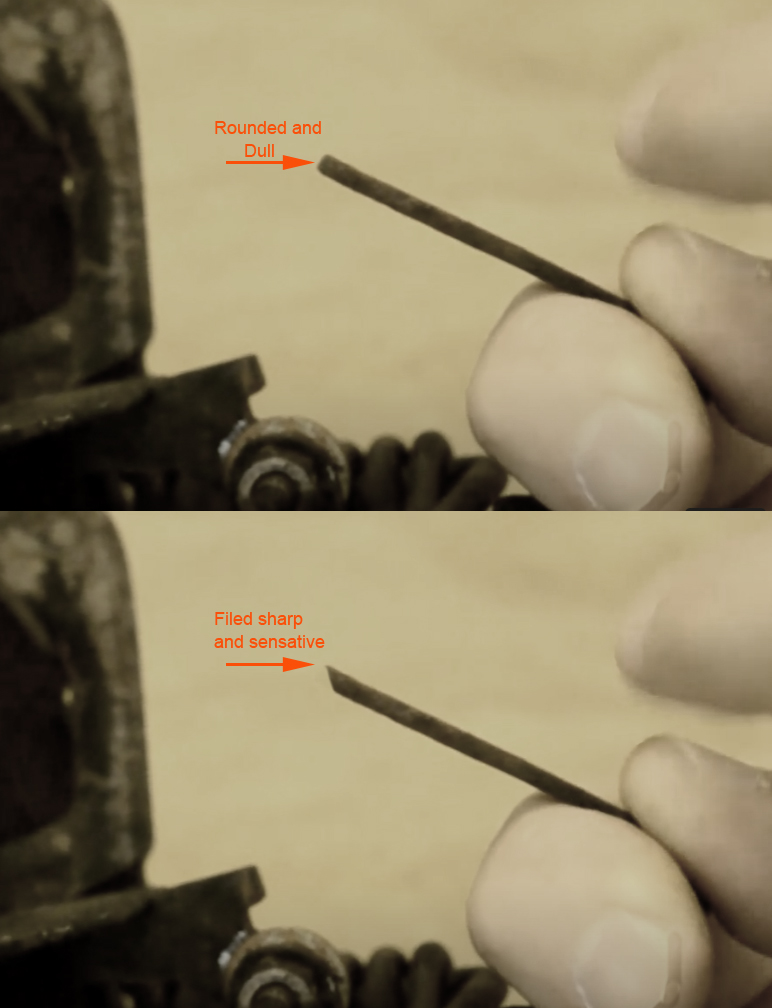
- Night Latching: This is a pro-level tune-up. It involves using a file to create a tiny, crisp 90-degree edge on the end of the trap dog and a corresponding flat spot on the pan notch. The result is a distinct "click" when the trap is set. There's no slop or creep in the trigger; it's either set, or it's fired. This creates an incredibly reliable and fast-firing trap.
- Chains and Swivels: A trap is only as good as its anchor. Check every link of chain for wear. Most importantly, ensure you have enough swivels - at least three on any coyote trap. I like one at the trap, one in the middle of the chain, and one at the stake. Swivels allow the animal to roll and spin without kinking the chain and creating a solid point to pull from, significantly reducing pull-outs.
As you inspect and maintain your traps, don't forget the tags. Just like springs, jaws, swivels, and chains, the tags have to be there too. Michigan's trapping laws are pretty specific about this. Make sure they're secure and legible since worn or missing tags can create problems you don't want.
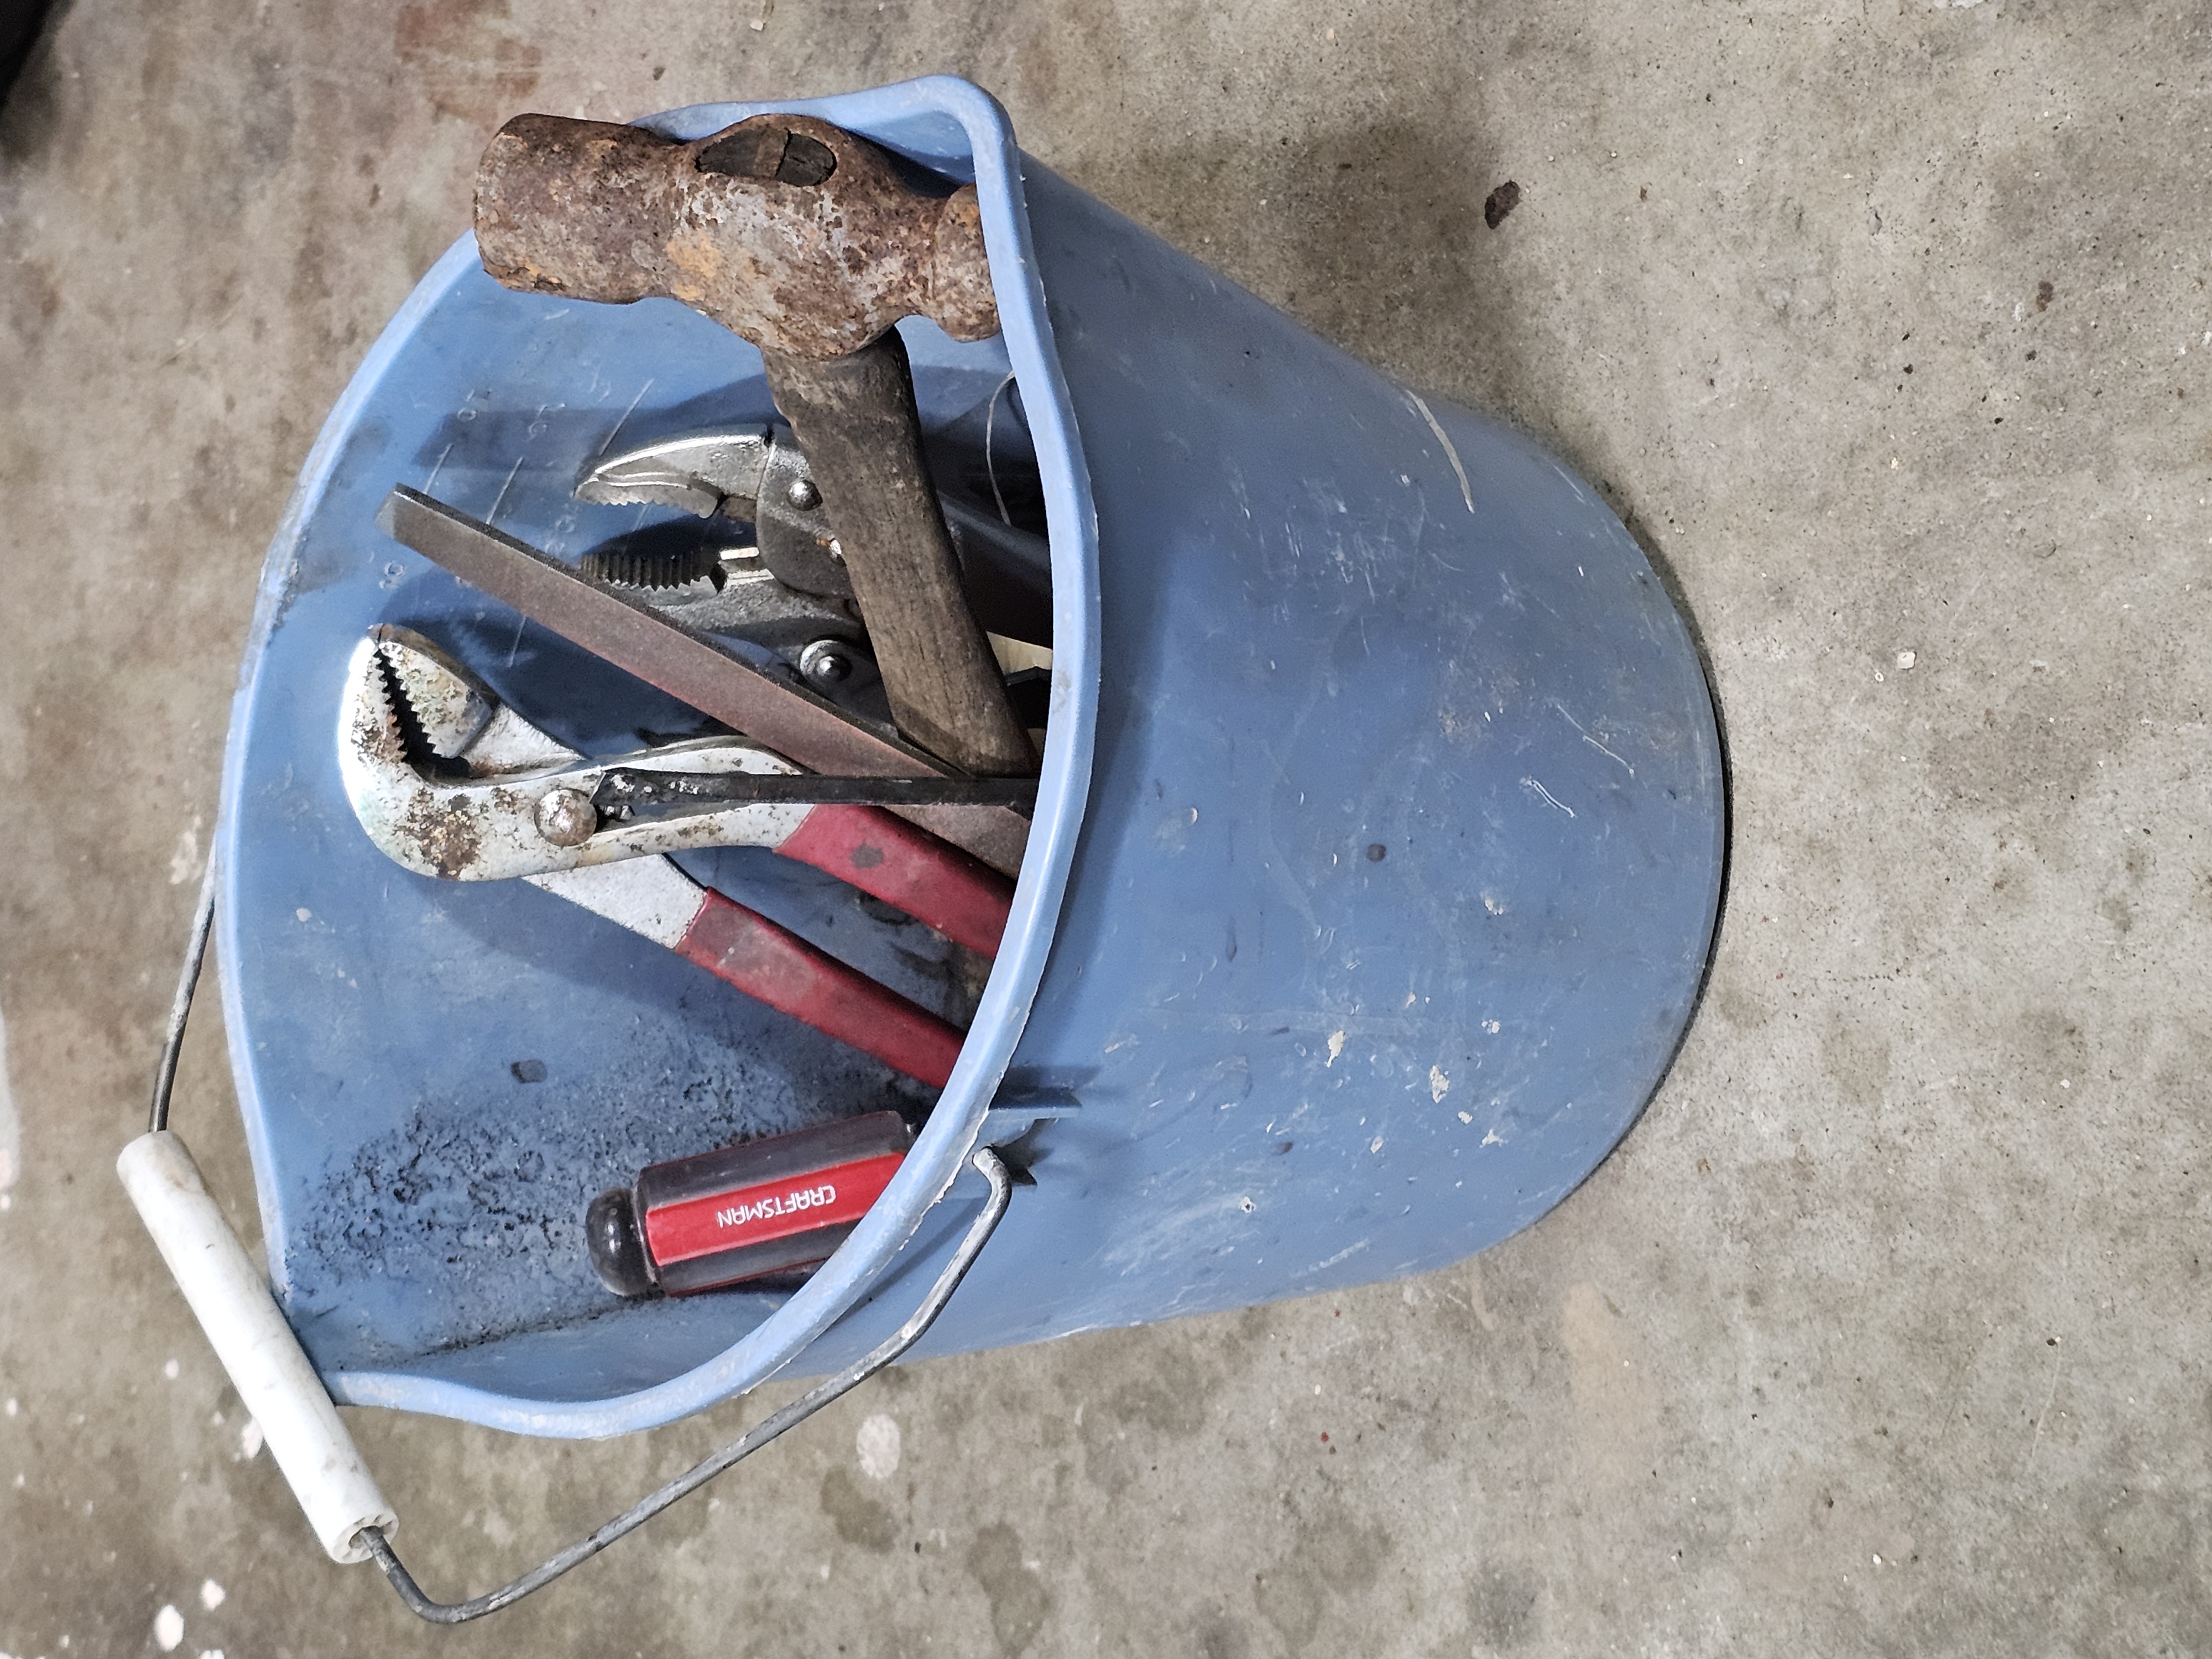
The Tailgate Toolkit
Keep a small toolbox in your truck for those in-season fixes. Mine includes a good pair of pliers, a mill bastard file, a small hammer, spare J-hooks and S-hooks, a J-hook tool, and some wire. With these simple items, you can reshape a bent dog, replace a busted chain link, or re-level a pan right on the line, keeping that trap in the game instead of adding it to the pile back at the shed.
Taking care of your equipment isn't the most glamorous part of trapping, but it's one of the most critical. It's an investment in your own success. A clean, well-maintained, and finely-tuned trap is a efficient tool.
A little time spent in the fur shed now means a lot more fur in the shed later.